

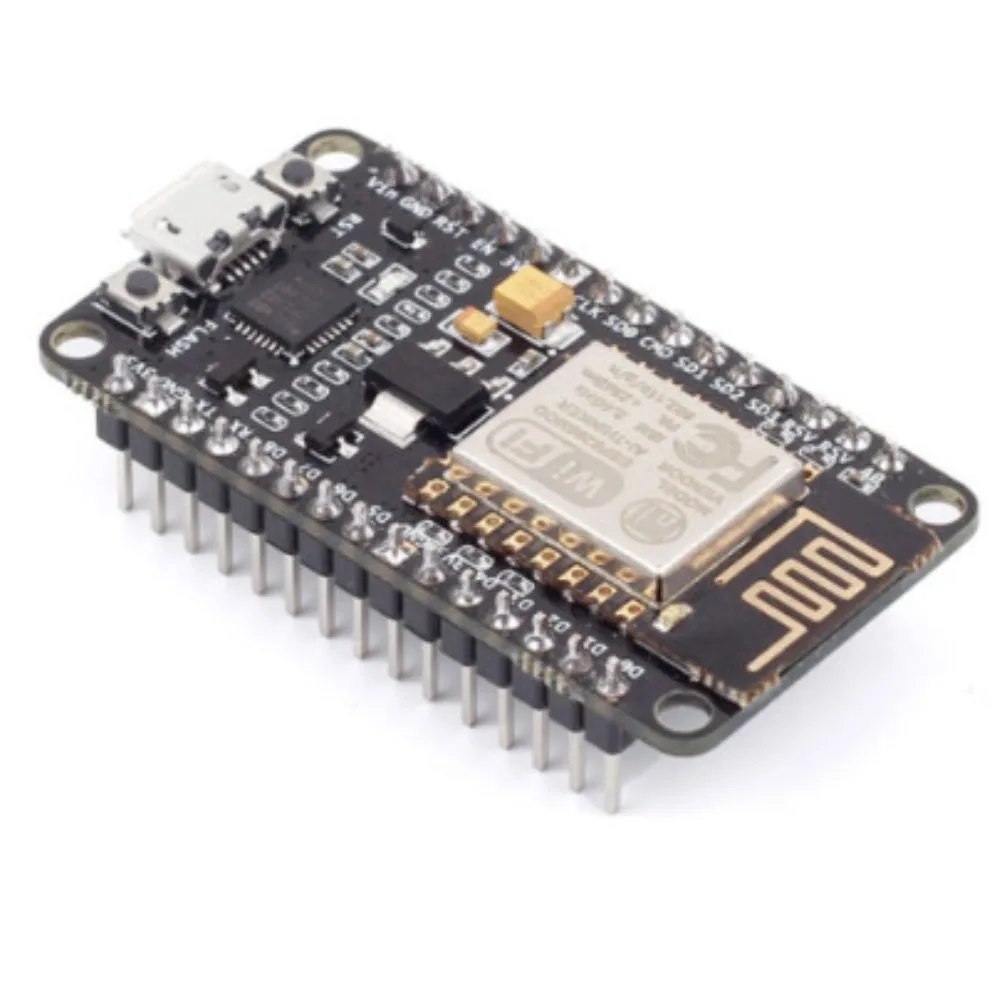

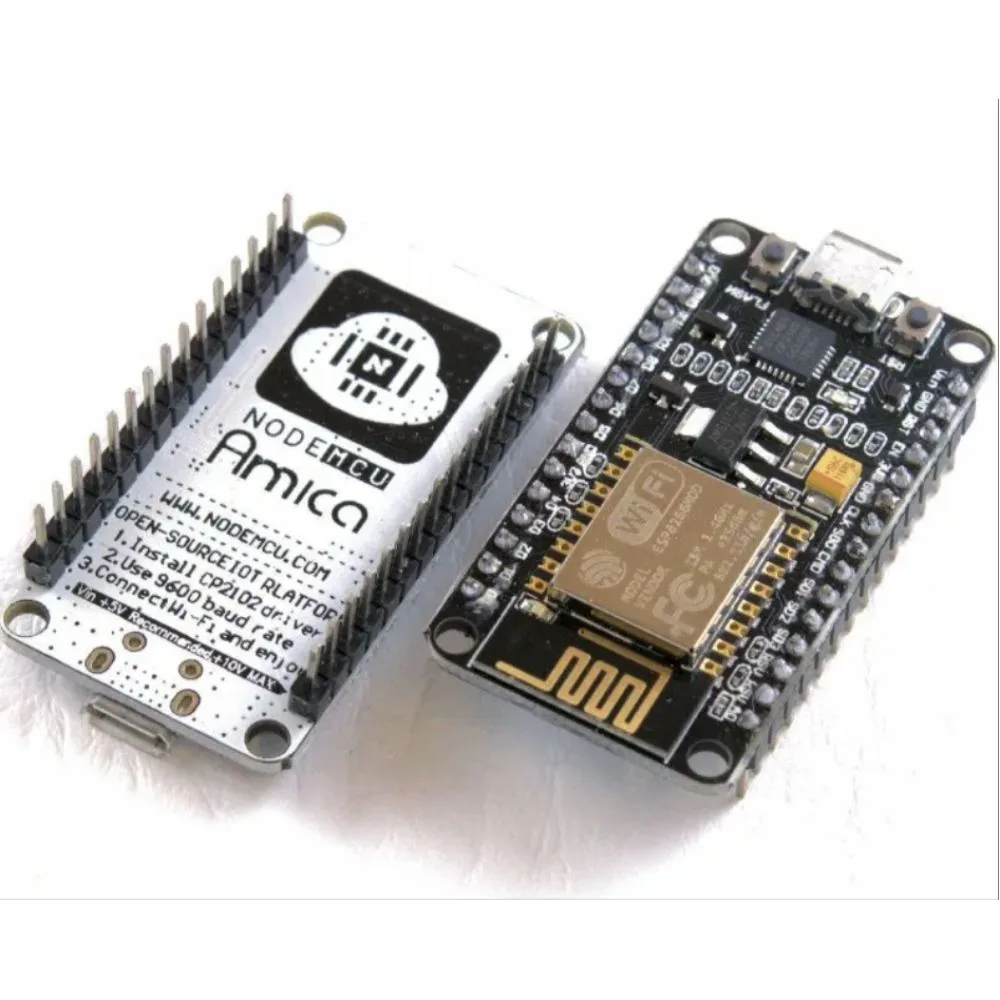
The ESP8266 NodeMCU (Amica Clone) is a low-cost Wi-Fi development board based on the ESP8266-12E (ESP-12E) Wi-Fi module.
It’s designed for IoT (Internet of Things) projects, allowing you to connect sensors, actuators, and devices to the internet easily.
The “Amica” version (or clone) refers to a board layout originally made by Amica — one of the earliest and most reliable NodeMCU board manufacturers.
Many “Amica clones” are now made by third parties but use the same design and pinout, making them fully compatible with Arduino IDE and Lua firmware.
Key Features
| Feature | Description |
|---|---|
| Wi-Fi Connectivity | Integrated 2.4 GHz Wi-Fi (802.11 b/g/n) with TCP/IP stack. |
| Microcontroller | Tensilica L106 32-bit RISC CPU, 80 MHz (can overclock to 160 MHz). |
| Flash Memory | Typically 4 MB (varies between 512 KB – 16 MB in some clones). |
| Programming Interface | Micro-USB interface with onboard CP2102 or CH340 USB-to-Serial converter. |
| GPIO Pins | 11 usable GPIOs (GPIO0–GPIO16, with some limitations). |
| Analog Input | 1 × ADC input (0–1.0 V). |
| Communication Interfaces | UART, SPI, I²C (software), and PWM supported. |
| Firmware Options | Supports Arduino IDE, MicroPython, NodeMCU (Lua), PlatformIO, etc. |
| Power | 5 V via USB or 3.3 V via VIN pin. Onboard regulator outputs 3.3 V for ESP8266. |
| Reset & Flash Buttons | Two buttons on board (RESET and FLASH). |
| Breadboard-Friendly | Designed to fit directly on a breadboard for easy prototyping. |
Specifications
| Parameter | Value |
|---|---|
| Microcontroller | ESP8266EX |
| Architecture | 32-bit RISC (Tensilica L106) |
| Operating Voltage | 3.3 V (logic), 5 V via USB |
| Flash Memory | 4 MB typical |
| SRAM | 80 KB user data + 36 KB instruction RAM |
| Clock Frequency | 80 MHz (default), 160 MHz (overclock) |
| Wi-Fi Protocols | IEEE 802.11 b/g/n (2.4 GHz) |
| Wi-Fi Security | WPA/WPA2 |
| Max Wi-Fi Speed | ~72 Mbps (theoretical) |
| I/O Pins | 11 digital GPIOs (PWM, I2C, SPI, UART) |
| Analog Input (ADC) | 1 channel, 10-bit resolution (0 – 1 V) |
| USB Interface | CP2102 / CH340G USB-to-Serial converter |
| Operating Current | 70 – 200 mA (depending on Wi-Fi activity) |
| Deep Sleep Current | < 20 µA |
| Dimensions | ~49 mm × 26 mm |
| Weight | ~8 g |
Pinout Overview
Common NodeMCU (Amica) pin mapping:
| Label | ESP8266 GPIO | Notes |
|---|---|---|
| D0 | GPIO16 | No interrupt, no PWM, no I2C |
| D1 | GPIO5 | SCL (I²C default) |
| D2 | GPIO4 | SDA (I²C default) |
| D3 | GPIO0 | Must be HIGH on boot |
| D4 | GPIO2 | Connected to onboard LED |
| D5 | GPIO14 | SPI CLK |
| D6 | GPIO12 | SPI MISO |
| D7 | GPIO13 | SPI MOSI |
| D8 | GPIO15 | Must be LOW on boot |
| RX | GPIO3 | UART RX |
| TX | GPIO1 | UART TX |
| A0 | ADC0 | 0 – 1 V analog input |
Programming Options
-
Arduino IDE (most popular)
-
Select:
Tools > Board > NodeMCU 1.0 (ESP-12E Module) -
Connect via USB and select correct COM port.
-
Use libraries for Wi-Fi, MQTT, sensors, etc.
-
-
MicroPython
-
Flash MicroPython firmware using
esptool.py. -
Use Thonny IDE or uPyCraft to upload code.
-
-
NodeMCU (Lua)
-
Original firmware; can use Lua scripts to control hardware and Wi-Fi.
-
-
PlatformIO
-
For advanced users who prefer VSCode integration and modular build system.
-
Tips and Best Practices
-
Power Supply
-
The ESP8266 is sensitive to voltage drops — use a stable 5 V USB supply or 3.3 V regulator (≥ 500 mA).
-
Brownout or unstable Wi-Fi = power issues.
-
-
Boot Modes
-
GPIO0, GPIO2, and GPIO15 determine boot mode:
-
GPIO0 = LOW → flash mode
-
GPIO0 = HIGH → run mode
-
-
The “Flash” button pulls GPIO0 low for programming.
-
-
ADC Precaution
-
ADC0 input range is 0 – 1.0 V (use a voltage divider if measuring higher voltages).
-
-
Deep Sleep
-
Connect GPIO16 → RESET pin to enable wake-up from deep sleep.
-
-
Serial Monitor Settings
-
Use 115200 bps baud rate for most firmwares.
-
-
Wi-Fi Range
-
Range up to 100 m (open air); keep antenna clear of metal and ground planes.
-
-
Common Issues
-
Upload failed? → Check COM port, correct board, and that GPIO0 is LOW when flashing.
-
WDT Reset? → Avoid blocking delays; use non-blocking code or
yield()in loops.
-
Example: Basic Arduino Sketch
Applications
-
IoT sensors (temperature, humidity, etc.)
-
Smart home automation
-
Wi-Fi relays and switches
-
Web servers / REST API devices
-
Remote data logging
-
MQTT / Blynk / ThingSpeak projects


There are no reviews yet.