

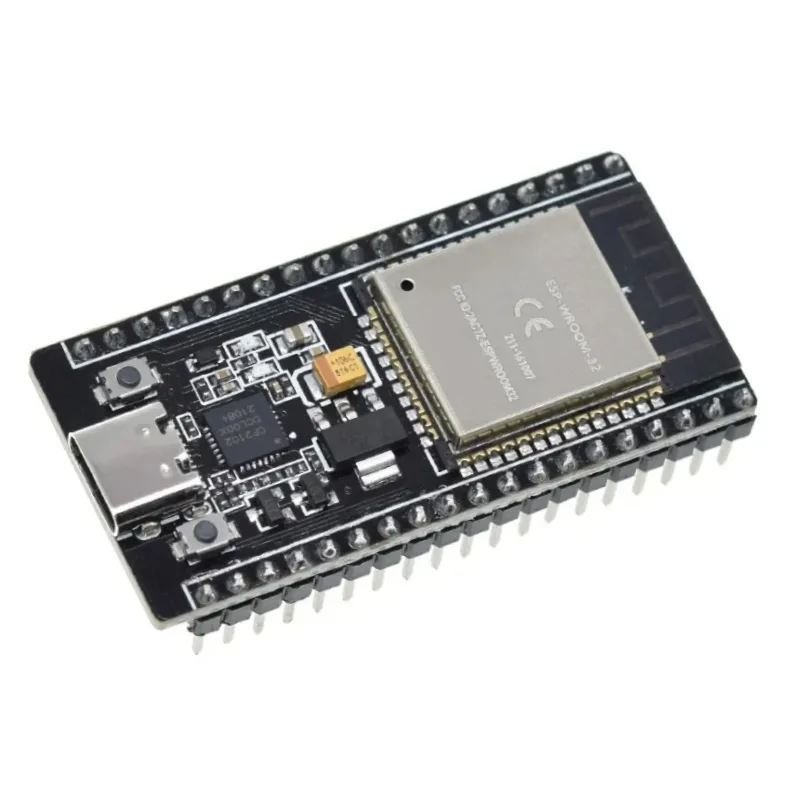
Features:
- This ESP32 development board supports STA / AP / STA + AP working modes, bringing you a lot of convenience.
- ESP32 development board integrates antenna switches, RF balun, power amplifiers, low noise amplifiers, filters and power management modules.
- Dual core ESP-32 development board, 2.4GHz Dual Mode Development Board.
- Ultra-Low power consumption,small volume, easy to embed to other products, works perfectly compatible with the Arduino IDE.
- ESP32 development board support lua program, easy to develop, support LWIP protocol, Freertos, three modes : AP, STA and AP + STA.
Advantages of USB Type-C
-
Reversible connector — no more worrying about plug direction
-
Stable power delivery and improved voltage regulation
-
Faster programming and serial communication speeds
-
Widely supported in modern laptops and USB hubs
Ideal For
-
IoT Projects (smart home, sensors, automation)
-
Robotics and control systems
-
Bluetooth and Wi-Fi communication applications
-
Edge computing and AI experiments (with libraries)
-
Learning and teaching embedded development
Getting Started Tips
-
First, install the Arduino IDE and add the ESP32 board manager
-
Then, select the correct board and port under the Tools menu
-
Finally, upload your first sketch — like or — to confirm it works.
watch this video if you want to be started working on .
Step-by-Step: How to Start Coding with ESP32
Install the Arduino IDE
If you haven’t already:
-
Download and install it from: https://www.arduino.cc/en/software
Install the ESP32 Board Support
To make Arduino IDE compatible with ESP32:
Add ESP32 Board URL:
-
Open Arduino IDE
-
Go to File > Preferences
-
In the “Additional Board Manager URLs”, paste:
-
Click OK
Install the ESP32 Platform:
-
Go to Tools > Board > Boards Manager
-
Search for ESP32
-
Click Install for “ESP32 by Espressif Systems”
Select Your Board & Port
-
Go to Tools > Board, select your ESP32 model (e.g. “ESP32 Dev Module”)
-
Plug in your ESP32 with a USB Type-C cable
-
Go to Tools > Port and select the correct COM port
Write Your First Code
Try this LED blink example:
-
Click Upload (→ arrow)
-
Wait for “Done uploading”
-
The onboard LED should blink!
Common Tips
-
If upload fails, press and hold the “BOOT” button on your ESP32 during upload.
-
Use 3.3V logic level sensors, not 5V (ESP32 pins are not 5V tolerant).
What’s Next?
Once you’re set up, you can:

There are no reviews yet.